 Jinye Machinery
Integrating a shrink wrapper into an existing production line requires more than placing equipment beside a conveyor. The real task is coordinating product spacing, conveyor speed, film movement, sealing, and tunnel heating. This guide explains How to integrate a shrink wrapping machine into a conveyor line with practical engineering detail. It focuses on stable product flow, safe access, and reliable control signals.
John R. Henry, a recognized packaging automation specialist and author, offers a useful principle: “Integration succeeds when product flow is designed before the machine is purchased.” That advice remains highly practical. A photoeye should detect each product before the infeed conveyor accelerates. Side guides must hold cartons without crushing them. The wrapper should communicate with upstream and downstream conveyors through clear start, stop, and fault signals.
Small details matter.
A well-planned line may include an accumulation conveyor, film sensor, sealing-jaw guard, temperature controller, and automatic reject station. The shrink tunnel also needs enough space for airflow and maintenance. Operators should test different carton sizes, film gauges, and conveyor speeds before approving production. A single unstable carton can create a long stoppage.
There is no universal integration recipe. Product shape, packaging material, line speed, and floor space change the design. Some installations look efficient on paper but fail during product changeovers. That weakness deserves honest review. Measure actual cycle times, not only supplier estimates. Check emergency stops, guarding, heat exposure, and cleaning access during trials. Reliable integration comes from controlled testing, documented settings, and practical feedback from the people running the line every day.
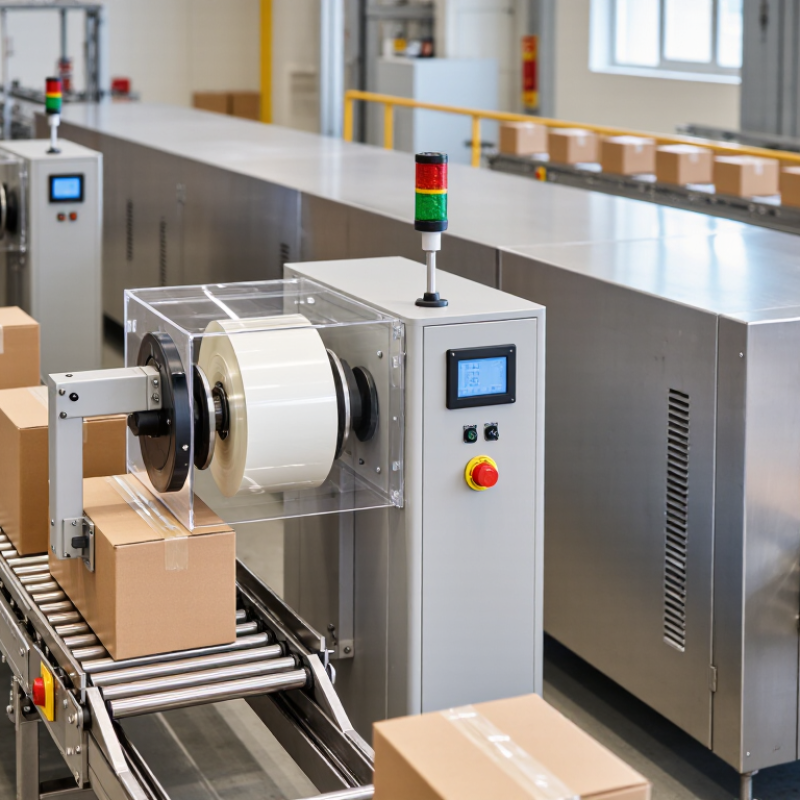
Choosing a shrink wrapping machine starts with production evidence, not catalog speed. Record hourly output, product dimensions, package weight, film type, and changeover frequency. A line running 20 packs per minute needs different capacity from one handling 80. Small details matter.
The PMMI State of the Industry report placed U.S. packaging machinery sales at about $10.2 billion in 2022. This signals strong investment, but it does not justify buying the fastest machine. Measure actual demand first. Smithers’ Future of Global Packaging to 2028 report also identifies efficiency, automation, and material reduction as major industry priorities. Therefore, assess film consumption, sealing quality, energy use, and operator workload together. A lower-speed machine may deliver better value when products vary often.
Check integration before signing a specification. Confirm conveyor height, electrical supply, compressed-air needs, sensor logic, and communication protocols. Test your smallest and largest products, including awkward shapes. Ask for seal strength data after extended operation, not only a demonstration sample. I would also calculate payback using real labor costs and rejected packs. Forecasts can mislead. Our first estimate may be too optimistic.
Leave space for inspection cameras, accumulation conveyors, and future product sizes. Document fault messages and cleaning access. A reliable system should reduce manual handling without hiding quality problems. A short trial run often reveals film wrinkles, weak seals, or unexpected stoppages.
| Assessment Dimension | Recommended Data to Collect | Typical Reference Range | Suitable Machine or Integration Choice | Integration Check |
|---|---|---|---|---|
| 1. Production Requirements | ||||
| Required throughput | Average packs per minute, peak demand, shift length, and planned operating days. | Manual: 3–10 packs/min Semiautomatic: 8–25 packs/min Automatic: 20–80+ packs/min |
Use a semiautomatic machine for variable, lower-volume work. Select an automatic line when continuous output and labor reduction are priorities. | Size the machine for peak demand rather than average demand. |
| Operating schedule | Hours per shift, number of shifts, changeover frequency, and annual production volume. | Light duty: 1 shift/day Medium duty: 1–2 shifts/day Heavy duty: 2–3 shifts/day |
Choose industrial-duty sealing, conveying, and heating components for multi-shift operation. | Confirm duty cycle, spare-parts availability, and maintenance access. |
| Product dimensions | Minimum and maximum product length, width, height, weight, and shape variation. | Record actual product extremes, including trays, multipacks, and irregular loads. | Use a machine with a sealing aperture and conveyor width that exceed the largest product with operating clearance. | Allow space for film overlap and product positioning. |
| Product stability | Whether the product is rigid, fragile, liquid-filled, dusty, sharp-edged, or easily displaced. | Rigid products generally tolerate higher conveyor speeds; fragile or unstable products require controlled handling. | Consider side guides, grouped-product tooling, speed control, and lower-temperature film settings. | Test the product after sealing, shrinking, cooling, and pallet handling. |
| 2. Film and Shrink Process | ||||
| Film material | Film type, thickness, width, roll diameter, core diameter, shrink direction, and sealing characteristics. | Common shrink-film thickness: approximately 40–100 microns, depending on product and handling requirements. | Match the film to the machine's sealing system, film path, maximum roll dimensions, and heat profile. | Verify compatibility before purchasing production film. |
| Shrink ratio | Required longitudinal and transverse shrinkage for the selected film. | Many polyolefin films provide balanced shrinkage; exact values vary by film construction and supplier specification. | Use adjustable temperature, dwell time, and airflow to obtain uniform shrinkage without product distortion. | Confirm shrink performance through a production trial. |
| Sealing method | Required seal strength, seal appearance, product contamination risk, and sealing frequency. | Impulse sealing is common for intermittent systems; continuous band sealing is common for higher-speed applications. | Use an L-sealer for single-pack or batch packaging. Use an automatic side-seal or continuous-motion system for higher throughput. | Inspect seal integrity, wrinkles, burn-through, and incomplete seals. |
| Heat tunnel requirements | Product size, film type, required finish, tunnel length, temperature range, and airflow direction. | Typical shrink-tunnel operating temperatures are often approximately 120–200°C, depending on film and product. | Select a tunnel with adjustable temperature, conveyor speed, airflow, and adequate heating capacity. | Use the film manufacturer's processing window as the starting point. |
| 3. Machine Selection Matrix | ||||
| Manual or chamber system | Low output, many product variations, limited floor space, and low initial automation requirements. | Approximately 3–10 packs/min, depending on operator skill and product characteristics. | Suitable for sampling, seasonal production, small batches, and frequent format changes. | Requires consistent operator loading and safe work procedures. |
| Semiautomatic L-sealer with tunnel | Moderate output, several product sizes, and a need to reduce manual wrapping effort. | Approximately 8–25 packs/min, depending on pack dimensions and operator workflow. | A practical choice for growing production lines with mixed products and moderate changeovers. | Provide sufficient infeed and outfeed space for the operator. |
| Automatic side-seal system | High throughput, long production runs, consistent product orientation, and reduced labor dependency. | Approximately 20–80+ packs/min, depending on machine configuration and product size. | Suitable for continuous production and integration with conveyors, collators, printers, and inspection systems. | Confirm product spacing, film tracking, and upstream conveyor synchronization. |
| Automatic sleeve or bundling system | Multiple products must be grouped into stable packs or promotional bundles. | Output depends on pack pattern, product dimensions, film thickness, and shrink-tunnel capacity. | Use collating, grouping, and sleeve-forming functions before the shrink tunnel. | Validate pack integrity during conveying, stacking, and transport. |
| 4. Line Integration Requirements | ||||
| Infeed conveyor | Product spacing, conveyor height, speed, orientation, and upstream accumulation. | Conveyor speed must be coordinated with sealing and tunnel dwell time. | Use variable-speed drives, guides, sensors, and accumulation zones where necessary. | Check that products enter the sealing area without tipping or overlapping. |
| Outfeed and cooling | Required cooling time, downstream equipment speed, product temperature, and handling method. | Cooling requirements vary with film, tunnel settings, product mass, and conveyor speed. | Add cooling conveyor length or forced-air cooling when packs remain too warm or soft for downstream handling. | Confirm that finished packs can be stacked without deformation. |
| Control system | Required sensors, alarms, recipe storage, machine communication, and operator controls. | Common functions include temperature control, conveyor-speed adjustment, film-break detection, and emergency stops. | Integrate sensors and controls with the existing line using compatible industrial communication and safety circuits. | Define start-up, stop, jam-clearance, and fault-reset sequences. |
| Electrical supply | Available voltage, phase, frequency, connected load, and site protection. | Industrial shrink systems commonly require single-phase or three-phase power; exact requirements depend on heater size and configuration. | Verify the machine nameplate, circuit protection, cable size, grounding, and local electrical regulations. | Have a qualified electrician approve the installation before commissioning. |
| Compressed air | Air pressure, flow rate, air quality, and pneumatic components used by the machine. | Many pneumatic packaging systems operate around 5–7 bar, but the machine specification is controlling. | Install filtration, regulation, drainage, and appropriately sized piping when compressed air is required. | Check pressure under peak operating demand. |
| Floor space and layout | Machine footprint, service clearance, material flow, operator access, and emergency exits. | Allow additional space for film-roll loading, maintenance, guarding, and product accumulation. | Prepare a scaled layout showing infeed, machine, tunnel, outfeed, operator position, and maintenance zones. | Keep hot surfaces, electrical panels, and emergency-stop controls accessible. |
| 5. Quality, Safety, and Operating Economics | ||||
| Quality acceptance criteria | Seal strength, pack appearance, film tension, wrinkles, holes, shrink uniformity, and product protection. | Define measurable limits for seal defects, open seams, excessive shrinkage, and damaged products. | Use standardized inspection samples and documented machine recipes for each product format. | Perform checks at start-up, after changeover, and at defined production intervals. |
| Safety provisions | Guarding, emergency stops, hot-surface protection, interlocks, lockout procedures, and operator training. | Safety requirements depend on local regulations and the machine's risk assessment. | Select equipment with guarded sealing and heating areas, accessible emergency stops, and clear operating instructions. | Complete a site risk assessment before installation and production release. |
| Material consumption | Film usage per pack, trim or waste rate, roll changes, and rejected-pack percentage. | Waste depends on film width, product dimensions, sealing setup, operator adjustment, and machine condition. | Optimize film width, product spacing, sealing position, and recipe settings to reduce unnecessary film use. | Track film consumed per accepted pack rather than only total roll weight. |
| Labor requirement | Operators per shift, loading method, film changes, quality checks, and maintenance tasks. | Automation can reduce repetitive wrapping labor, but loading, inspection, replenishment, and maintenance remain necessary. | Choose automation level according to labor availability, throughput, product mix, and return-on-investment targets. | Include training and changeover time in the labor calculation. |
| Return-on-investment inputs | Machine cost, installation, utilities, film consumption, labor, downtime, maintenance, and rejected product cost. | Evaluate total cost of ownership over the planned service period rather than purchase price alone. | Compare manual, semiautomatic, and automatic scenarios using the same production volume and quality assumptions. | Base the decision on measured production data and a documented trial. |
| 6. Recommended Implementation Sequence | ||||
| Step 1: Collect baseline data | Measure output, product dimensions, film usage, labor time, defects, and downtime. | Use representative products and peak production conditions where possible. | Build a product-and-volume matrix before requesting machine quotations. | Completed baseline data reduces oversizing and integration risk. |
| Step 2: Run a packaging trial | Test selected film, sealing temperature, tunnel temperature, conveyor speed, and pack handling. | Evaluate both minimum and maximum product sizes. | Use trial results to confirm machine aperture, tunnel capacity, film width, and speed. | Approve the process only after quality and throughput targets are demonstrated. |
| Step 3: Prepare the site | Finalize layout, utilities, ventilation, guarding, access routes, and downstream connections. | Complete installation drawings before equipment delivery. | Coordinate mechanical, electrical, controls, safety, and facility teams. | Site readiness prevents avoidable commissioning delays. |
| Step 4: Commission and validate | Verify safety functions, throughput, seal quality, film consumption, changeover time, and fault recovery. | Run a documented acceptance test using normal production materials. | Release the line only when agreed performance and safety criteria are met. | Record approved recipes and operator procedures for repeatable operation. |
Start with actual production data. Record hourly output, product size, package weight, film type, and changeover frequency. A line making 20 packs per minute needs different capacity from one making 80. The fastest machine may not offer the best value.
Measure film consumption, sealing quality, energy use, rejected packs, and operator workload. Product variety matters greatly. A slower machine may perform better when sizes change often. Small details become expensive later.
Confirm conveyor height, electrical supply, compressed-air needs, sensor logic, and communication connections. Test both the smallest and largest products. Include awkward shapes. Leave room for cameras, accumulation conveyors, and future sizes.
Run the machine with real products and film. Watch for wrinkles, weak seals, poor tension, and unexpected stoppages. Check performance after extended operation, not just one attractive sample. Short trials expose uncomfortable truths.
Use a dry, level floor with enough service clearance. Leave space around access panels and the film roll. Adjust the feet until the conveyor sits evenly. A stable base matters.
Use the machine plate to identify the required electrical supply. A qualified electrician should complete grounding and protection checks. Never guess the voltage. Connect clean, regulated compressed air when required, and check pressure with a gauge.
Check the frame, conveyor, sealing bar, guards, and emergency stop for shipping damage. Confirm that the unit can be isolated during service. Close every guard before energizing the system. Safety checks can feel repetitive, but skipping them creates risk.
Thread the film along its marked path and keep the roll centered. Run a dry cycle before testing a small package. Watch the seal line, temperature response, conveyor tracking, and package tension. The first trial rarely feels perfect.
Possible causes include low heat, poor alignment, or contaminated film. Change one setting at a time and record each adjustment. This feels slow. It makes faults easier to trace.
Calculate payback using real labor costs, rejected packs, energy use, and film consumption. Include expected changeovers and maintenance time. Forecasts can mislead. Our first estimate may be too optimistic.
Integrating a shrink wrapping machine into a conveyor line requires careful planning, equipment selection, and systematic setup. The process begins by assessing product size, packaging volume, production speed, and available floor space to choose a suitable machine. The workspace should then be prepared with reliable power, compressed air if required, appropriate film materials, ventilation, emergency stops, guarding, and clear operating procedures. Proper positioning and alignment help maintain a smooth product flow between the conveyor, wrapping area, and downstream equipment.
To understand How to integrate a shrink wrapping machine into a conveyor line, operators must correctly connect the machine, configure film width, sealing and shrinking temperatures, conveyor speed, and product spacing. A controlled test run should follow installation to identify wrinkles, weak seals, film waste, jams, or inconsistent shrink quality. Adjusting settings step by step, documenting results, and training personnel can improve efficiency, safety, and packaging consistency across the integrated line.
